This guide covers how to use Foreman to manage taking miners down for repair, bringing them back online, and replacing down miners with a spare.
Removing a Miner for Repair
When you have a miner that needs to be removed from your rack for repair or maintenance, you can manage the process from start to finish through the Miners table.
To remove a miner, click into the actions menu of the miner you'll be removing on your Site Map and choose Pull Miner. Since this miner will not be operating until it returns from the shop, you'll want to select in repair for the status and click to open a ticket from the modal.
Clicking Confirm will clear the selected cell on your Site Map and launch the Add Ticket window with your miner information already populated. You can input your ticket name, then assign an Owner, Priority, and Status.
Clicking Save will assign the ticket to your specified owner, who can change the ticket status to Resolved once the repair work has been completed.
Returning Miners to Service
Now that your miners are in good shape, it's time to return them to service. Depending on whether you are returning one or many miners to service, you'll want to use either Manual Assignment or Interactive Fill Assignment. Both options are detailed below:
Manual Assignment
To assign a single miner to your Site Map, click on the empty cell you'd like to assign your miner and select Assign Miner. Then, enter the MAC address from your ticket and click Assign to finish the job
.

Interactive Fill Assignment
If you have more than one miner returning to service simultaneously, the Interactive Miner Add feature allows you to add them all at once.
With Pickaxe running on a Windows laptop cabled directly into the same local network or switch as the miner you are trying to add, click the gear icon on the rack you want to fill and select Interactive Fill. Then, select the Pickaxe running on the laptop in the pop-up window.
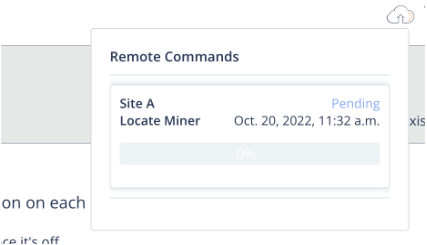
Select the Current Profile of the miner you're adding, then press Listen. Once you see an "In Progress" in your Remote Commands window in the top right, press the IP report button on your miner. You'll see that your miner is now assigned to the empty grid location on your Site Map. Click Finalize to complete the fill assignment.
When you click Finalize, a window will appear asking you which Pickaxe will hold the newly assigned miners. You'll want to select the main Pickaxe responsible for your Site here, not the temporary Pickaxe on the technician's laptop.
The Pull Miner and Interactive Fill functions allow you to maintain a complete site history. This is great for compliance - giving you visibility on where everything is and who worked on it last. You also get to keep the ticket history to track if certain miners are continuously having trouble.
Replacing a Miner with a Spare
To keep your facility operating at its peak efficiency, you can plug a spare miner into the spot vacated by the miner sent out for repair.
To do this, you'll click Replace rather than Pull Miner on the cell on your Site Map. Similar to the Interactive Fill Assignment from above, you'll need a laptop with a temporary Pickaxe installed that is cabled directly into the same local network or switch as the miner you are replacing.
In the window that pops up, select the Pickaxe on the technician's laptop and click Listen.
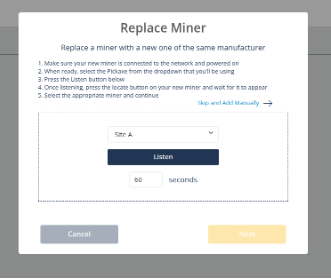
Remove the old miner from the shelf and replace it with the new one. Once your new miner is plugged in, click the IP report button. Next, select the miner from the list and click 'Next.' Then, you'll have the option to use a Bluetooth scanner to scan in the serial number of the new miner.
At the confirmation window, you’ll have three options on what to do with the old miner:
1. Disable the miner
2. Disable the miner and open a ticket
3. Delete the miner
Have more questions? Submit a request below or reach out to the customer success team directly. We'd be happy to help!
Comments
0 comments
Article is closed for comments.