Managing inventory is a fundamental part of daily operations in mining, whether it's spare hashboards, fans, cables, or general supplies. While small operations might rely on spreadsheets or manual counts, growing sites introduce more complexity, making those methods inefficient and error-prone.
The Inventory feature on the Foreman dashboard is designed to simplify and centralize this process. It provides a flexible system for tracking inventory items across locations, managing restock alerts, and organizing parts by type, manufacturer, and client—all in one place.
By using Foreman’s Inventory system, mining operations benefit from:
- Real-time visibility into current inventory levels and locations.
- Automated low-stock alerts to prevent supply disruptions.
- Organized item categorization for faster search and retrieval.
- A centralized, digital record of inventory movement and history.
- Scalable inventory tracking as your operation expands.
This feature helps ensure that the right parts are available when needed, supporting maintenance workflows, reducing downtime, and improving overall efficiency across your mining facilities.
Navigation
To view and manage Inventory:
- Click Operations from the left navigation menu, then select Inventory.
Inventory Table
The page includes the following columns for each inventory item:
Name – a label to help you quickly identify the inventory item, such as "S9 Hashboard" or "S9 Fan."
Type – categorizes the item (e.g., Hashboard, Fan). New types can be added in the Inventory tab under settings, as details in this article.
Client – indicates the Client ID or facility the item is associated with.
Location – specifies where the item is stored, either within the Site Map or another designated location.
Quantity – the total number of units currently in stock.
Assigned – shows how many items are currently assigned and linked to tickets.
Notification Threshold – the minimum stock level that triggers a low inventory alert when reached. Learn about how to set a notification threshold in this article.
Actions – provides options related to that specific inventory item.
Want to add additional fields to this table?
New custom field(s) can be added from the Account Settings in the Inventory tab. Follow this article for details on how to execute.
Filters
The filtering function allows you to quickly narrow down the Inventory table by specific criteria such as item name, type, client, location, or other column values. This helps you find what you're looking for faster—whether you're searching for a specific part, checking quantities at a certain site, or reviewing items by manufacturer. Filters are especially useful for managing large inventories and ensuring you're always working with the most relevant data.
Note: You can also now filter and search by Offline Locations.
- To filter the Inventory table, click into the Filters field to view all available inventory fields for your company. Select one or more filters, then click Filter to apply them and update the table. To remove all filters and view the full list again, click Clear Filters.
Inventory History
- Click View History to open the history modal for all inventory items.
- Within the modal, you can search for a specific item, user, or action.
- Clicking a specific item will open a new tab with only that item visible.
- From this same modal, you can click Export to automatically download.
Upload Inventory

-
Click Upload Inventory to open the upload modal. This is especially useful when onboarding new equipment or making large-scale updates to existing inventory.
- Full details on how to Upload Inventory can be found here.
Add Inventory
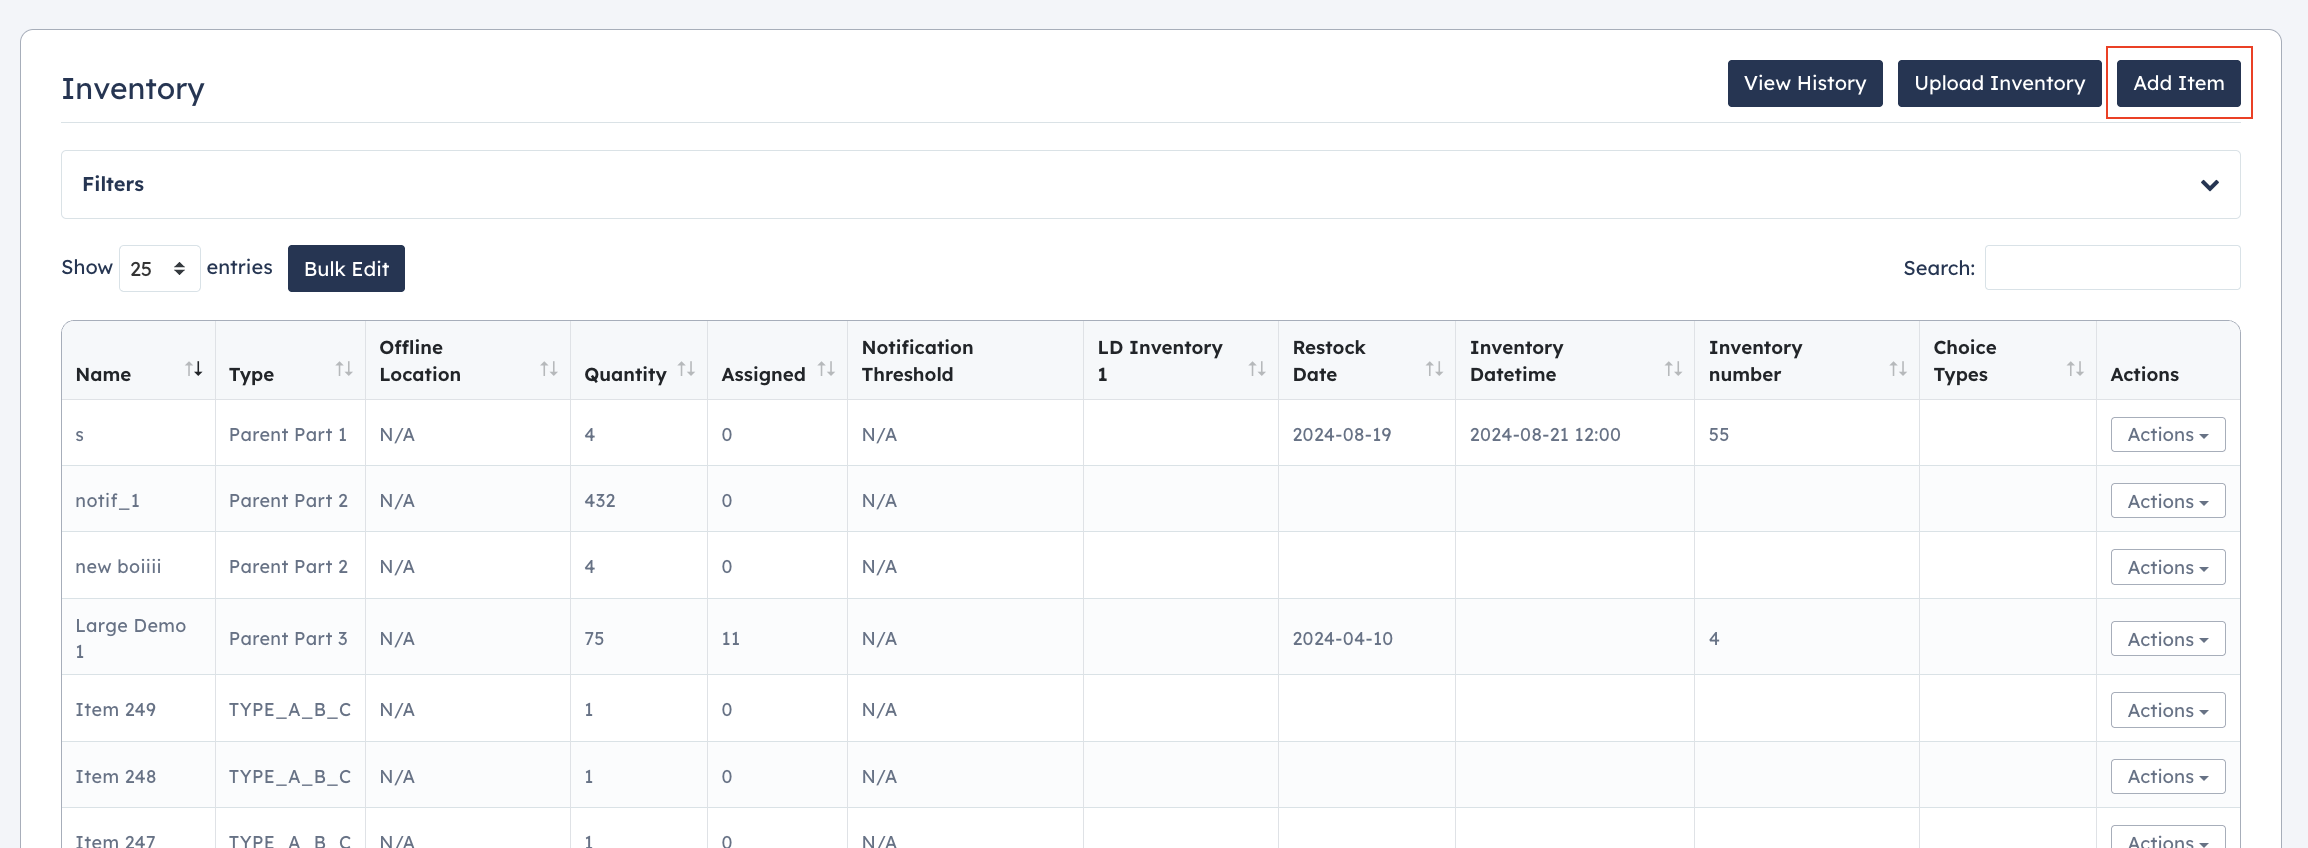
- Click Add Item to open the creation modal, where you can input details and add new items to inventory.
- Fields include:
-
- Name - name this specific piece of inventory, must be unique.
- Type - single select, this is a drop-down field based on your company's inventory types set in settings. More details can be found in this article.
- Quantity - the total supply you have in stock for the inventory part you are adding.
- Notification Amount – the minimum quantity of this part you want in stock before triggering a low inventory notification.
- Client - single select, this is a drop-down of available clients for you.
- Offline Location - this is the location where the part is located.
- Remaining fields are optional and can be edited or updated at a later time.- Click Save to add in your new inventory item.
- Click Save to add in your new inventory item.
- Full details on how to Add Inventory can be found here.
-
- Fields include:
Manage Inventory
Bulk Edit
- Click Bulk Edit to open the ability to select all or multiple items at once, then click Edit (#) to open the bulk edit modal.
-
Abilities here include: Client, Location, Inventory Custom Fields, Set Notification Threshold, and Delete Inventory.
-
Client - bulk move items to a different client depending on your permissions and configuration.
- Offline Location - update multiple items at once by selecting a single location from your existing offline location options.
-
-
Inventory Custom Fields - depending on your custom inventory fields set, you may select from that list and bulk edit inventory items at one go here.
-
Set Notification Threshold - bulk change the inventory set notification threshold for all items at once, this will override the previous number set.
-
Delete Inventory - bulk delete items, be aware that this cannot be undone.
Actions
- Each inventory item has an Actions menu on the far right of the table, with options that vary based on the specific item.
- Available actions may include: Edit, History, Delete, View Open Tickets, and View All Tickets.
-
Edit - opens the edit modal for the item, make any changes then click Save to keep your changes.
-
History - to give you a record of changes made to the item.
-
Delete - pop-up modal will appear where you can confirm deleting this specific item, note this cannot be undone.
-
View Open Ticket - this will open a new tab of the open ticket(s) tied to this inventory item, where you can find the statuses and review a complete repair history using an audit log.
-
View All Tickets - this opens a new tab of all ticket(s) related to this specific inventory item, this will include tickets in all statuses.
-
- Available actions may include: Edit, History, Delete, View Open Tickets, and View All Tickets.
Export
-
Click Export to automatically generate a .csv file of all inventory items in the table at this time.
-
Click Export Reorder Report to automatically generate a .csv file of all current inventory items, including details on when each item should be reordered based on its notification threshold.
Have more questions? Check out our other Assets and Inventory articles, submit a request below, or reach out to the customer success team directly. We'd be happy to help!
Comments
0 comments
Please sign in to leave a comment.